10 Pro Tips for Making Better Quality Video at Home
Video has become essential for promoting businesses, products and communication. This has been the case for years now. In an annual survey of over 650 businesses, 92 percent said that video is an important part of their marketing strategy, up from 78 percent in 2015. With 88 percent of respondents reporting positive ROI from video marketing, (up from 33 percent in 2015) and the shift to an even more online-centric community as people shelter at home, video’s importance will only continue to increase. It’s proven to increase conversions by double and even triple digits, and is one of the best ways to create an authentic human connection.
But, authenticity does not necessarily mean low production values. While there are plenty of grainy DIY cat videos that have gotten millions of views, when it comes to using video for a business or professional venture, you need to meet a higher standard. A video shot in your poorly lit kitchen with garbled sound will not do much to enhance the image of your brand; in fact it will likely do the opposite.
The gold standard of course, is to hire a professional videographer with all the gear to stage a shoot and edit the video, adding music, overlays, b-roll, etc. But, staging a shoot is not possible right now. Does that mean you need to pause your video marketing efforts? Not at all.
I have been working with businesses to create promotional content for close to ten years, and recently I’ve been experimenting with a hybrid approach to helping clients create more video by supporting their employees in making user generated video from home. While nothing can replace quality lenses, top notch cameras, audio gear and lighting, many people can shoot business-quality video on their cell phone and email the files off to a video professional for editing and finishing touches.
Here are ten pro tips for shooting business video at home that will ensure your video will be usable in a business format and will enhance your brand:
Camera Placement
1. Hold or place your phone horizontally or in landscape position.
This is the best for video, as it has the same aspect ratio — 16×9 — that we are used to seeing in movie theaters. It is also the format that will work universally across all social channels. If you shoot in portrait mode, your video will render as a square. That’s okay for Instagram, but on YouTube, it will be square in the middle of a black field, so you’ll be giving up a lot of real estate on the screen.
 Figure 1. Source.
2. Place camera at eye level.
You should be able to look directly into the lens without the need to tilt your head to look up or down. If the camera is below you, it can result in some unflattering shots, as well as a subtle feeling of looking down on the viewer. Placing the camera at eye level brings you eyeball to eyeball with the viewer.
In Figure 2, the subject is eye level with chest up framing. There is space above the subject’s head. A finger or pencil width is a good amount of space at the top.
 Figure 2.
3. Position the camera far enough away from you so that your body is in the shot, but not so far away that it is hard for your phone to pick up the audio clearly.
Framing yourself from the chest to the top of your head usually works the best. If you have a separate microphone, you may be able to frame yourself from the belly button to the top of the head. In either case, leave some room at the top, so the camera is not cutting off the top of your head. Don’t: Fill the entire screen with your face.
4. To prevent wobble, use a tripod, selfie stick or stable items around your home to hold the camera.
A pile of books on a table, a counter top or a book shelf are good options. If all else fails, find a friend or family member with a very steady hand to help you out.
Framing the Shot
5. Unless you have pro-level staging skills, find an area in your home or office that has little to no clutter.
Remember, everything in frame is what people will want to look at. Avoid distracting your audience with unnecessary items.
In Figure 3, the subject is in front of a white wall or empty room which is great for eliminating distractions.
6. Position yourself in the center of the frame.
While it’s preferable artistically to position yourself slightly to one side or the other, every social platform displays video differently. Positioning yourself in the center is the best way to ensure you show up well on all channels.
 Figure 3.
Lighting the Subject, A.K.A. You
7. Lighting makes a huge difference in video quality.
When making video at home, in general you want to have the main light source to be in front of you and next to the camera. This can be a lamp or window. Do not stand in front of a window, as this will make you a silhouette.
 Figure 4.
 Figure 5.
In Figure 4, we see the use of natural light in a shaded area with no additional lighting. In Figure 5, we see the use of in room fluorescent lighting to keep the subject well lit.
Avoid shooting in direct sunlight, this is usually too bright and can cause unattractive white spots and shadows in your video. Find areas with controlled and even lighting, such as indoors or shaded areas.
Getting Clear and Clean Audio
8. Find a quiet place where you can control the noise level.
Your phone camera will usually do a good job picking up your audio, however keep in mind: it will capture all the noise in the room equally. If you record in a noisy cafe, the phone will pick up all the cafe noise in addition to your subject’s audio. Planes, trains, car horns and loud people will come through in your audio. Wait for them to pass before continuing to record your video.
Also remember: The further away from the camera you are the harder it will be for your phone to pick up your audio.
Here are some ideas for filming locations to reduce noise interference:
- Office: Close the door and tell co-workers or family members not to bother you and to make little to no noise because you are recording video. Put a sign on your door, give them a time range. People appreciate the information and love to help.
- Shaded backyard: If you live in a quiet neighborhood this can be a fun area to shoot. Be mindful of lawn mowers, loud music and barking dogs.
- Unused rooms or areas: Sometimes a conference room will be vacant, or consider using before and after hours spaces which may be quiet for a few hours.
How to Be on Camera
9. Even if it’s just you taping you, nerves are real.
When you are about to record yourself on camera it will be normal for some jitters to arise. Here’s how to combat them:
- Breathe. Take a deep breath before speaking.
- Smile. It is okay to have a big smile on your face before you begin speaking. This makes you look more personable and will help your nerves as well!
- Laugh. You will flub words and make mistakes. That is okay. Laugh it off, take a deep breath and start again!
- Be nice to yourself. Allow yourself to finish your sentence or thought. Don’t over-analyze every word that comes out of your mouth. Chances are you look and sound great!
- Pause for five seconds after you hit record and before you hit stop. This ensures you have enough space for your editor to work with.
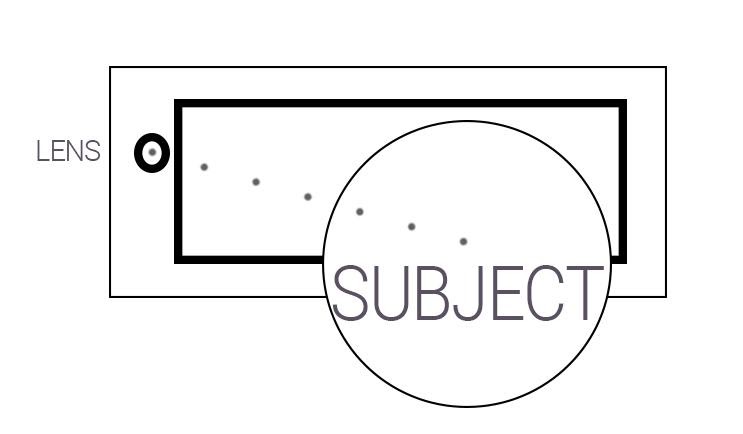
10. Look into the camera lens.
With front facing cameras it is really easy to look at ourselves while we talk. Be sure to make the effort to look into the lens of the camera! This can be a challenge, but your audience wants to see you talking to them, not yourself.
This will help your nerves since you won’t be focused on your image while you talk.
Final Steps and Checks
- Wipe your lens to make sure it is free of smudges.
- Put your phone on airplane mode to avoid calls and text noises.
- Switch phone to front facing camera.
- Make sure you have enough space on your phone
- Lock your exposure/focus. If you have an iPhone, here is a helpful video on how to do this on your phone. If you have an Android, use the Open Camera app.
- Have fun!
Have questions? Please reach out to: videostudio@alexiskeenan.com


